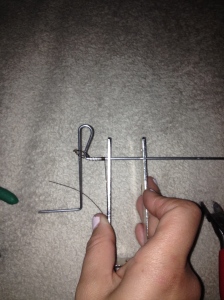
How-To Make a Cork Mirror Chalk Board: DIY Project Wednesday

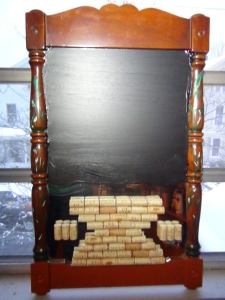
Here’s a fun little snow day project for anyone looking to make their own cork/chalk board. Perfect for the kitchen (where I plan to use mine!), an office, dorm room, bathroom, or wherever! The best part of this is it requires minimal time/expertise & you can be as creative as you wish.

Difficulty level: Easy

Time Needed: About 1-2 Hours depending on how creative you want to be

What you will need:

(1) Mirror – any size/shape (I used an old mirror that was in pretty bad shape)

(1) glue gun -About 3-5 glue gun sticks depending on how many corks you wish to use

(40-50) Corks- Again, depends on how big you want your cork board, I used 41. Start cracking open that wine!

Chalkboard Paint & 1 sml. Brush

(1) Roll Blue Painters Tape

Lets Begin!

First you want to tape around the mirror, block off the parts you don’t want to accidentally get chalkboard paint on. If you want to do your chalkboard paint in a design, use the painters tape to create a custom design!

DSC00613


I chose to make the end of the board in a wavy form. I also wanted to keep some mirror showing so decided to place my corks in an unusual pattern. I actually love this way more than the traditional half cork/half chalk tutorials you see online. Don’t be afraid to shape your corks however you wish! You won’t lose the function and you will add something different!

DSC00614


Let dry and your board is complete! The wooden frame of this was scratched up so I decided to paint some vines up the sides! (using acrylic paints) Here’s the final product:

DSC00615

DSC00621

How To Chevron Paint DIY-Tutorial 3 Easy Steps

Happy Wedneday Bloggers!

I’ve seen a ton of how-to chevron tutorials on the web, and they all make it look so easy! Anyone whose ever attempted this knows, getting that design right can be difficult. I am going to show you my tutorial of how I chevron paint. For me, it’s not all about getting the lines to match perfectly across the surface you’re painting. It can drive a person wild laying down tape at all the precise angles. I decided to use the chevron design on my bedroom door but I didn’t focus on making all the lines straight. Instead, I had slight imperfections in the line up which I think made this design all the more unique and fun to wake up to every morning!! So let’s get started…

DSC00607

What you will need:

Paint- I used Martha Stewart Metallic Paints. 2-3 small containers you can find at your local Home Depot paint department.

Brushes- Two small paint brushes, 1 angled and 1 straight

Tape- Large (about 3 inch wide) Blue painters tape


Step 1:

DSC00603

Don’t forget to tape around the door to keep the final product looking neat! Paint the entire door with your base color. This will be your lighter color, the one that you will have be the focus of the chevron design. This could take several coats and possibly two bottles of your base color-depending on the size of the door.  Remember this is the color that will cover the entire door so you will need more.


Step 2:

DSC00604I waited a full day between layers to be sure the paint would not peel from adding the tape too early. Once it has dried, you can begin adding your tape. As you can see, not all my lines are identical-because it’s nearly impossible to do so without driving yourself crazy!! Don’t worry, make your lines the best you can…I promise it will look even better in the end!


Step 3:

DSC00605Add your second color! Be sure all the edges of the tape are air tight against the door. If there is an opening, you can bet paint will drip in and leave a nasty drip mark in the middle of your design. Be sure to paint sparingly, don’t cover the tape entirely, try to paint just over the end of the tape. Once it dries it will be hard enough to pull off without paint sealing it to the door completely.


Wait sufficient time, I know…you’re anxious! But peeling the tape off too early could also result in drip marks or uneven edges between colors. I waited another day before pulling it all off to reveal this fun door!!

DSC00606


Hope you guys enjoyed this tutorial! Good luck with your chevron creations!!

How-To DIY Chalkboard Paint Metal File Cabinets-Tax Season DIY Inspiration

With tax season vastly approaching and I attempt to organize all my paperwork, a lonely old file cabinet catches my eye. I picked up this dusty old thing a couple months ago with plans to make it fit in with my office. What better time to restore this cabinet than when it is needed most! I mistakenly erased my progress pictures but I will give a step by step of how-to go about fixing up and painting a metal cabinet. This tutorial doesn’t require excessive mod lodging, spending lots on materials, or any tools other than some tape and a paint brush! THIS IS FOR THE QUICK AND EASY DIY PROJECT SEEKERS!

DSC00599


What you will need:

Martha Stewart Texured Paint -This stuff is amazing and cheap! about $6 per container and you can buy everything form sparkly black to crackle paint!

1 small canister of chalkboard paint

BLUE brand painters tape-if you plan to paint the handles as I did, it helps to tape off to make it as clean as possible

2 small paint brushes-1 angled, 1 straight


The Before: Of course, I accidentally deleted my before picture, my apologies. But this cabinet was a dinged up black cabinet with coffee mug marks on the top-to give you a visual.

There were a couple dings on the side-looks like it was preyed open before they found the lock key! To fix dings like this in a metal cabinet, all you need is to hammer them out. If hammering leaves chips on metal, just use a light sandpaper to smooth out.

First we used the Martha Stewart Textured Metallic Lampblack paint to cover the sides, top, and front of cabinet. This paint dries fairly quickly and should be applied with a small brush.

Next, pull out the drawers and lay down the first coat of chalkboard paint. Once dried, apply a second coat-chalkboard paint can chip when used if the application is too thin.

Once the second layer dried we taped around the handles and painted them with Martha Steward Anchor Gray Metallic paint.

This is a pretty simple how-to paint project for anyone looking for a quick spruce up on bland office equipment!


DIY Quirky Studded Earrings-3 Simple Steps to Apply to Anything!

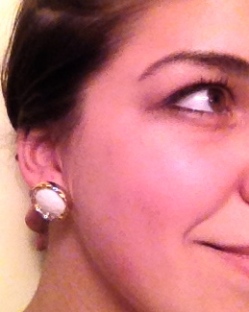
Just a few tutorials that are quick, easy, and fun! Each earring requires JUST 3 STEPS. You can make anything into a stud earring, here’s something to inspire those who are feeling the need to spice up their accessories.

What you will need:

-E-6000 Glue

-Stud Backings

-Earrings: two pieces of similar bismuth crystals, two matching buttons, two matching stud pieces

How to:

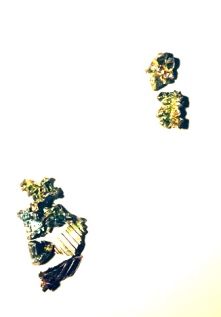
Let’s start with bismuth crystal studded earrings

Image

Find two bismuth crystals similar in size. Grab a stud and some E-6000. Apply a small dab to the stud and press it to the crystal. Leave it to dry and be sure it doesn’t shift while drying! Easy as that!

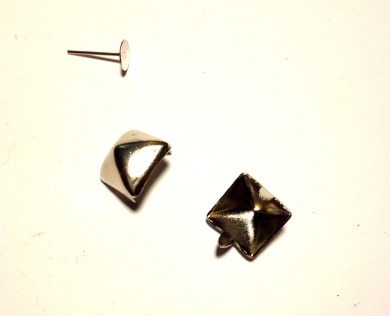
Want some bold studded stud earrings? Here’s how:

ImageImage

Bend the tails of the stud inward as far as possible. Add a dab of E-6000 and attach stud backing!

Image

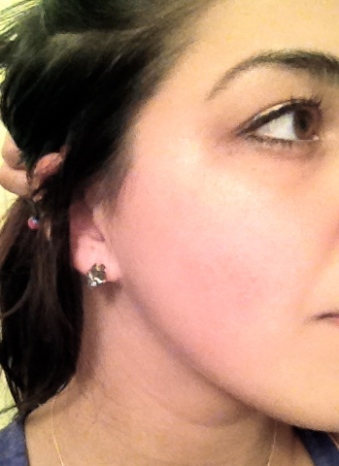
I think you get the picture! Find something AWESOME that you want to rock, grab some stud backings and some E-6000 and VOILA! New earrings! We also made button earrings using some fancy vintage buttons. Below are all of the final pics of the earrings! Happy Crafting!

ImageImageImage

Runway to Walkway-How to Style Like the Stars in Everyday Life

What better way to kick off our newest category posts, “Runway to Walkway” than with a tribute to the Golden Globes!

We are constantly seeing runway fashions, couture gowns, and gorgeous designer creations on television and the web; the problem is that these amazing creations aren’t suitable for everyday wear. Why should we have to keep the couture reserved for the rich and famous and special events? I think there are plenty of things we can take away from the designs coming off the runway to inspire our everyday attire. This post will show the ways we think runway fashion can be recreated in everyday attire through simple mixing and matching or adding some simple DIY ideas to add some swag to your step.

Todays focus? Golden Globes:

Zooey Deschanel rocked this fabulous Oscar De La Renta dress at this years Golden Globes. We love the cream color and the springtime feel that this dress has.

Image

Now, how to make this runway look work for your everyday life? Here are a couple ideas of how to incorporate the feel of this dress in your attire:

ImageImage

This top from H&M jumped out at us when thinking of the runway gown. The cream colored embroidered blouse is elegant and appropriate for the office or a night out! Pair it with cream pants or shorts with some beige heels.

-This top can be found here : http://www.hm.com/us/product/22992?article=22992-B

If you’re a fan of the tulle than we think a long tulle skirt paired with a beige cap sleeve crop would serve you best!

You can find tulle skirts almost anywhere and in a variety of lengths. We love the floor length tulle skirt to match this look, you can find one similar here: http://www.shopruche.com *Dancing Through Life Tulle Maxi Skirt In Cream*

Got some ideas for this outfit? Share with us here!

DIY Wednesday- 4 Step Wire Wrap Ring Tutorial

So I know everyone has seen those awesome chevron rings and wire wrapped rings on Pinterest, and many of you may have attempted to create them. They aren’t too difficult, and we all love them! This tutorial is for those of you looking for a quick, awesome ring that takes less than 5 minutes to make! 

Image

Here is what you will need:

Craft wire- I prefer 16 gauge wire, it is easy to bend yet stays in shape!

Wire Cutters-can get these at any craft store

Ring Sizer- If you don’t have one, you can use a marker 

Beads- Two beads, I like to use old beads from broken jewelry

Glue- E-6000 is my go-to for jewelry making


Step 1: Cut about one ring of wire 

Image

Step 2: Wrap the wire around your sizer (or maker) 3 times. Cut excess so the ends are on the same side of the ring.

Image

Step 3: Fit your beads, make sure they don’t budge when you put them on. If they do, I suggest finding something with a smaller bead hole.

Step 4: Apply some E-6000 to the ends and slide your beads on. If there is a bit of wire sticking out, use a nail file to smooth it down.

ImageImagewire

Let it dry and enjoy rocking your new statement piece!!


DIY Wednesday- DIY Crafty Wedding Gifts

I will be attending a wedding this weekend and although cash is my go-to gift, I like to add a little something extra for fun. The following step-by-step guide is for a fun and crafty wedding gift. This can also work for engagement parties, bridal showers, baby showers (replace booze with baby bottles!) etc. 

Image


What you will need:

-bottles :I used the bride and grooms favorite beers (New Castle and Magners Cider)

-Scrap Black Fabric -for bowties

-White Tinsel Fabric-Wedding Isle of Michaels Craft Store

-Gold string

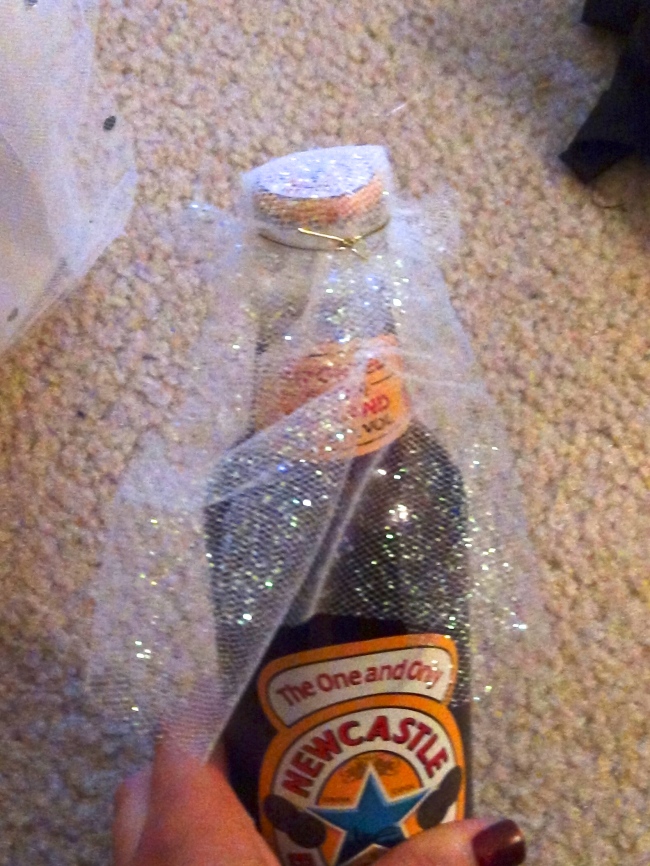
-Bride and Groom Bottle Covers-Wedding Isle of Michaels Craft Store

-Corks

-Wooden Letter

-Glue Gun and Sticks


Step 1: The Cork Letter

Use a large wooden letter for a base and begin glueing corks in random pattern until filled.

ImageImageImage


Once you finish glueing your letter will be complete and take just a few moments to dry.

Image


Step 2: The Grooms Bottles

I used one of the (6) bottles to put the grooms bottle cover over. The rest will be adorned with bowties.

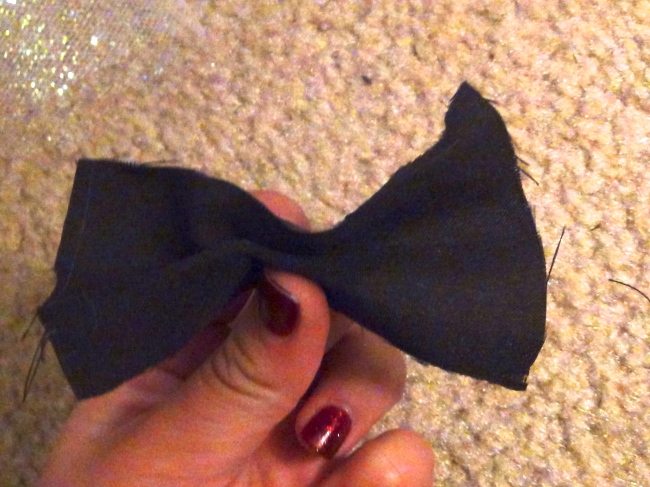
1-scrunch the bow ties together

Image

2- Place one string through the middle and tie one around to make the bow


Image


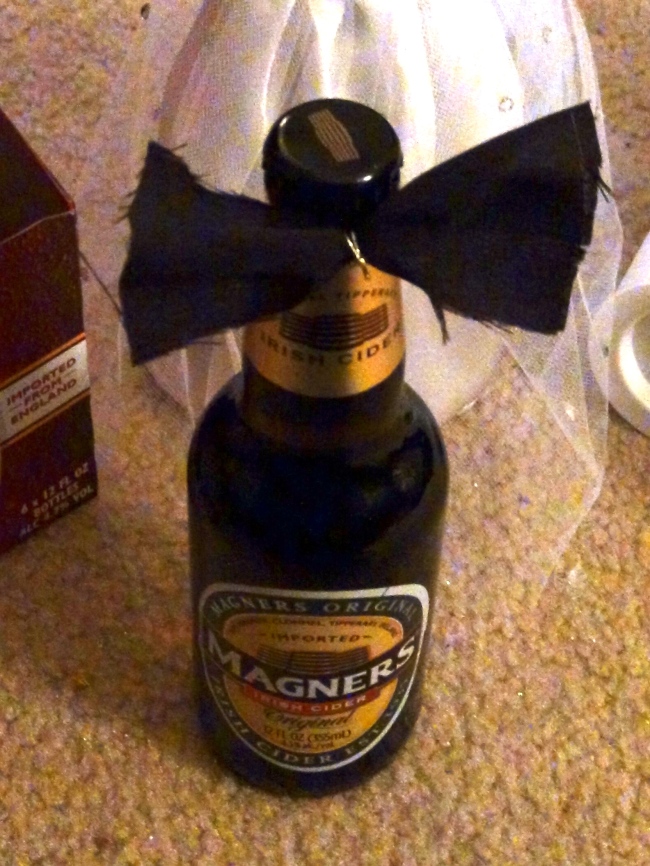
3- Attach to bottle and voila! You have a new bow tie for your bottle. Repeat for each groom bottle in your basket.

Image


Step 2: The Brides Bottles

1- Cut a piece of white tinsel fabric and place around bottle like a veil. (May need someone to hold while you tie it together)

ImageImage


2-Repeat for each of the brides bottles.


Step 3: Place together and voila! 

I put the bottles into each six pack to keep from moving around and placed into a basket. The bottles with the covers were placed higher than the rest and the Corked Name Letter was placed at the back. 

ImageImage


Image

DIY Wednesday- Upcycled Holiday Centerpiece

With Thanksgiving just one day away, I thought it would be nice to share with everyone what I decided to do for my table’s centerpiece. There is plenty of holiday decor you can purchase to make your table look fabulous, but if you want to be a little crafty, why not try this quick project to make your very own! I made a couple things to piece together and each element of this project can be customized to fit your color scheme or theme!

DIY- Upcycled Holiday Centerpiece

Image

What you will need:

-Bottles (I used two SKYY Vodka bottles with the labels peeled off) -As many as you would like to use!

-Glue (Recommended: E-6000 industrial adhesive -I use it for everything)

-Mod Podge & brush

-1 Hot glue gun-E-6000 can be used if you do not own a glue gun

-1 Pumpkin (or more if you would like!)

-About 7-8 leaves from outside (Preferably ones that are still fresh and not too crispy)

Step 1:

Have you ever tried to use a flame to cut a bottle? This was my first try and it was not as simple as most tutorials make it seem. I had a bit of a jagged edge but since I was covering it, it wasn’t a big deal. Here is a quick how to:

-Fill a small dish with nail polish remover

DSC00531


-Grab some string and wrap it around where you would like the bottle to break. I started with a hemp wire and it did not work at all.  I found using an old shoe lace wrapped 3 times around finally broke the thick bottle!

DSC00534

-Remove the string and dip in polish remover until completely soaked

-Place back on to bottle and light the string

WARNING: Be sure the polish remover isn’t dripping down the bottle as this will also ignite and become quite dangerous to hold. -I know, because it happened to me!

-Hold both ends of the bottle until the flame has spread evenly and goes out.

-Immediately dump the bottle into ice cold water (filled my sink) and the bottle should crack immediately.


DSC00533


Once this step was complete, I began gluing hemp string around the top of the bottle. Using a hot glue gun (or an alternative strong adhesive) place a line of glue around and follow with the string. Once the first bit is secure, continue to wrap the string around only adding glue when necessary. I used two bottles for this project, both SKYY Vodka bottles. By cutting one bottle and leaving the other, adding hemp tied together both looks!

DSC00537

DSC00536


Next: The Pumpkin!

Since I decided to go for a natural theme for my centerpiece, I collected some leaves and attached them to a white pumpkin. The beauty of this step is that you can customize it however you’d like! Want to add some lace to that pumpkin? Go right ahead! Maybe get a black sharpie or paint and make a unique design. You can even add pearls or rhinestones glued into an elegant swirl!

If you would like to mod podge some leaves, here’s what to do:

1-Collect 7-8 leaves (for a medium sized pumpkin) Make sure you get leaves that are somewhat fresh and flexible without cracking and crumbling.

2-Since some of my leaves were a little weathered, I used the E-6000 glue to place them around the pumpkin

DSC00538
DSC00539

DSC00543


2-Once laid flat, mod podge over the leaves to secure them.
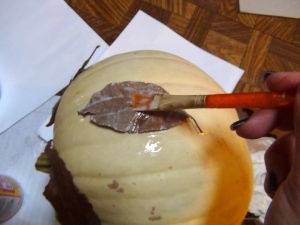
DSC00544

You can also crumble the leaves around the top to fill in some open spaces.

DSC00545


Let this pumpkin dry for about an hour and voila! A unique addition to your centerpiece.

Once finished, I decided to take the tall bottle and add a twig with some berries on it from my yard. The other bottle was filled with water and a floating candle. I added a small ceramic squash candle holder and metal leaves from an old broken fall decor item. I plan to take these items and spread them across the runner on our table for Thanksgiving, making the piece run the length of the table. There are many ways to tackle this project, let your imagination play!

Happy Thanksgiving!!

DSC00549DSC00551

DIY Wednesday: Decoupage Lamps…Thursday Edition!

After battling some technical difficulties, the DIY Wednesday post is back. I apologize for the delay, I’m sure many of you bloggers out there have experienced this scenario: write the whole blog and tags just to have the computer freeze and erase it! twice!! So, without further adieu, DIY decoupage lamps!

What you will need:

Mod Podge (store bought or home made: equal parts elmer’s glue & water) I prefer the store bought gloss finish mod podge

1 Medium Brush

Lamp Shade

Scraps paper, maps, memorabilia, etc -whatever you wish to decoupage! I chose to use some memorabilia:

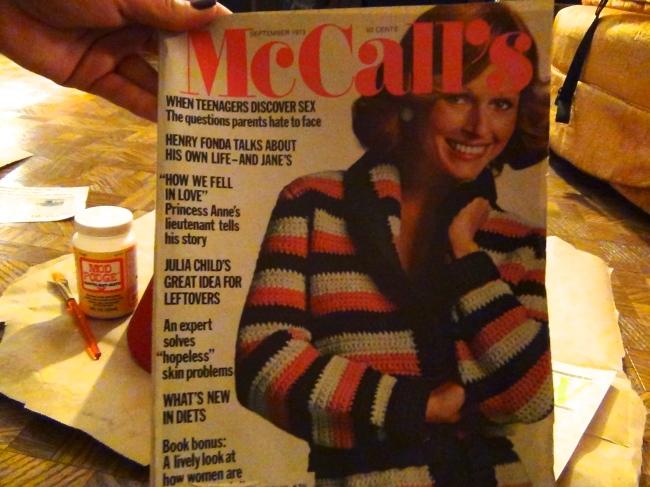
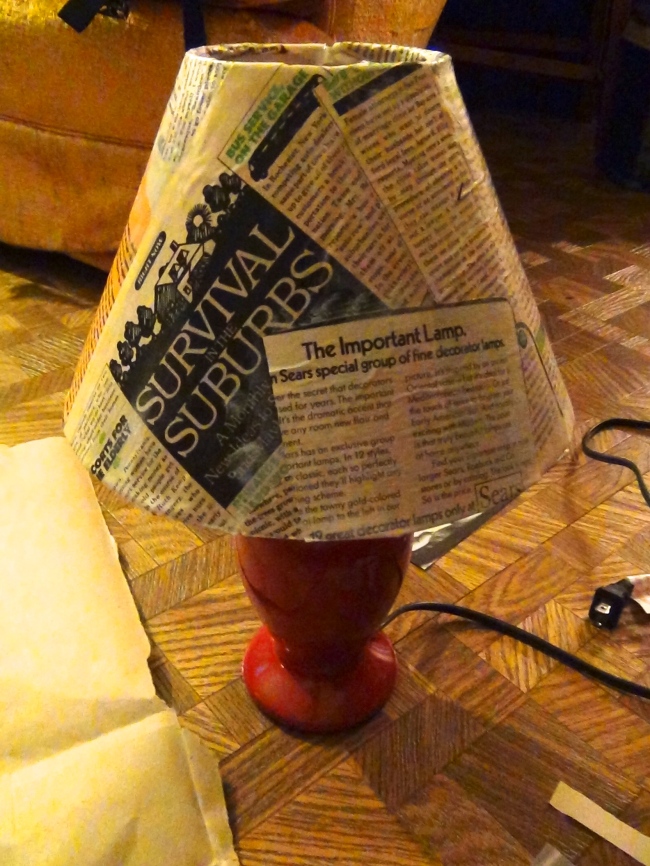
Two Lamps- Two Themes -Vintage McCall’s Magazine from the 70s and a newspaper from the first day of the first ever US Tomorrowworld Festival.

Step 1:

If you have any sort of lip on the shade make sure to peel it back so that you have a smooth even surface to work with. Cut up any papers or articles you wish to use on the shade to appropriate size. 

ImageImage


ImageImage

Step 2: Begin applying Mod Podge to the shade-work in sections as it dries quickly. Be generous and use enough to get the first piece down.

ImageImage


Step 3: Lay the first piece down and mod podge over the top. Cover the piece completely but try to keep it smoothed out. Don’t worry if there are little creases, they usually smooth out when drying. Continue to mod podge until the lamp is covered.

ImageImage

Step 4: If you have excess hanging over the edge, either cut it to fit or smooth it over to the inside of the shade with mod podge.

Image


Step 5: Let Dry and Viola! Enjoy your new fabulous lamps! Below are some pics of ouImage

ImageImage B

ImageImageImage


If you use gloss finish mod podge, these will dry to a nice shine finish!

Here is a little extra fun find: From the McCall’s magazine- an ad to tell readers that mannequins will be made to model real life women. Love it! Plump is Pretty! 

Image


Happy Crafting! 

DIY Wednesday: Wire Wrapped Earrings

Wire wrapping is something that I’ve been playing around with for a few weeks now. I love wrapping crystals to make pendants and pushing the boundaries to see what I am capable of. While playing around with wire the other night, I fashioned some wire wrapped earrings quite easily! This post is to help any new wire wrappers out there and I hope to inspire some awesome jewelry creations! In addition to these earrings, all of my wire wrapped jewelry is available in my Etsy store at http://www.etsy.com/shop/upcyclellc.

DIY Wire Wrapped Earrings

IMG_3676

What you will need:

Wire -for this project I used 20 gauge bronze craft wire

The Coiling Gizmo – a wire wrapping tool that makes those tight coils in just seconds! -you can opt to do it by hand, but know that it may take a bit longer and the double spiral may be very difficult. This tool can be found locally- (The Rock Garden, Branford, CT) or in most shops that specialize in crystals and wires for pendant making.


Step 1: Take a the wire (i usually don’t cut it so that I can use as much as needed) and tie the end around the coiling gizmo.

Begin to twist it to make a tightly wound coil.

IMG_3656


Step 2: String a new wire through the coil you just wound. Then repeat the first step. Wind the new coil, when you get to the middle, wind the twisted wire to create a larger coil design in the middle.

IMG_3659

IMG_3662


The finished wire should look like this:

IMG_3654


Step 3: Take a few loose strands (I used 3) and twist them together by hand. Once twisted, string this through your coiled wire design.

IMG_3666 IMG_3668


Step 4: Twist the wire at the top to create a loop for an earring hook.

IMG_3671


Additional Step (5): Adding a decorative feature. This is done by winding a new coil with the tool and stretching it out. Once this is done, it can be twisted around the middle of the earring. This keeps the bottom wire from sliding around and adds a little something extra!

IMG_3672 IMG_3673


Step 6: add an earring hook-available at any craft store and you have your very own handmade wire wrapped hoop earrings!

IMG_3676


Have a wire wrapped DIY of your own? Share it here! Hope you enjoy this DIY project!

All my wire wrapped jewelry is available on my etsy shop at http://www.etsy.com/shop/upcyclellc !